on
The Waag FabLab - 3D Printing (in progress...)
First things first, the lab ! Today Michelle have introduce the lab’s machines to me ( Or maybe she introduce me to the machine ?). I’ve decided to write a guide for futur new people in the lab. Hope it will be useful…
1/8 The 3D Printers
3D Printers
First of all, let’s talk about the 3D printer of the lab. The lab has 3 operationnal 3D printer at the moment. (Maybe two more with a bit of intern magic)
- IMG
The first one I’ve met is the Prusa I3mk3. This machine is basically a Prusa I3 clone but with a lot of improvement that are very appreciable.
- IMG
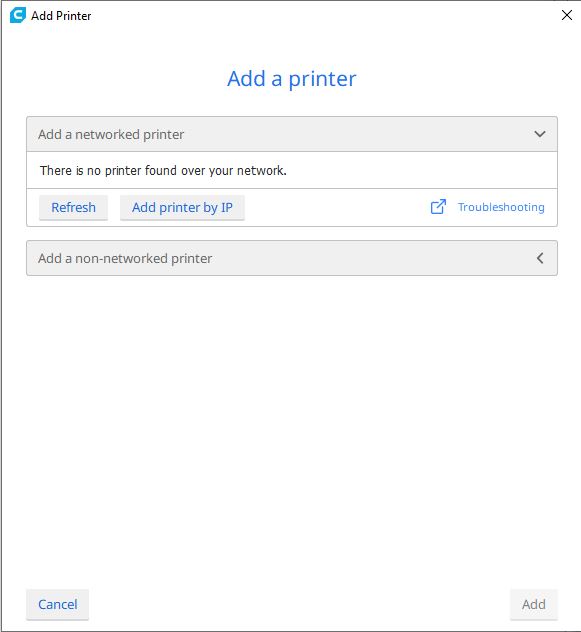
So when you already have a piece to print. You first need to slice it using a slicer (like Cura or Slic3r for example). The simpler, the better. Cura v4.4.1 already have the Prusa I3 mk3 in its preset. So We’re gonna use it.
When you lauch Cura for the first time, you’ll have to add a new 3D printer.
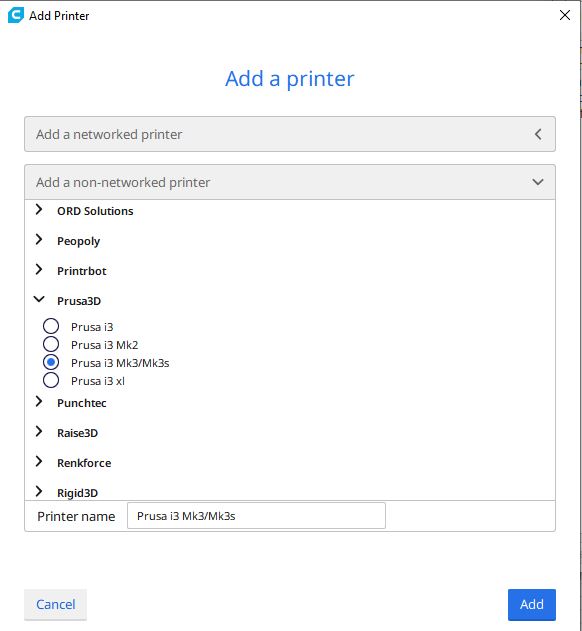
In the list of the non-networked printers, select Prusa i3 Mk3/Mk3s in the Prusa3D category
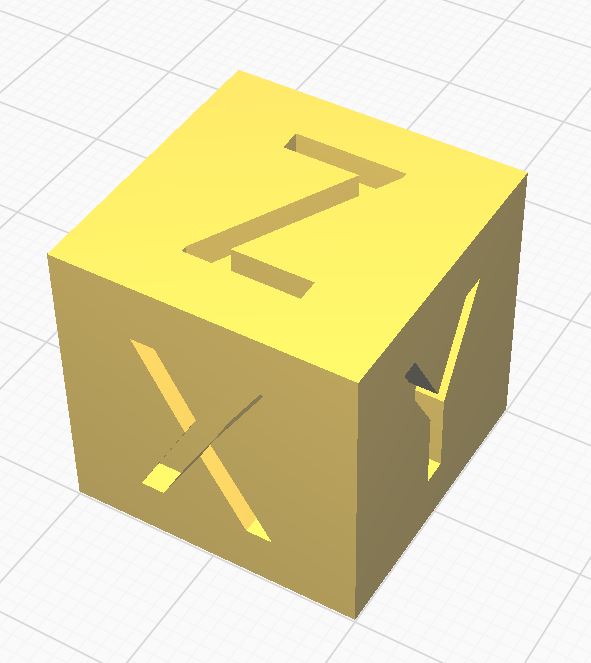
The printer should now be added into Cura. So now you can prepare your STL file to be printed. I’ll do a simple test with a calibration Cube like so :
Before slicing our part. We need to setup the material we will be using. You can use generic PLA and ajust the temperature then onto the machine. But if you’ll use often the same plastics, then you’d better to add a custom one.
To do so, click on the material dropdown :
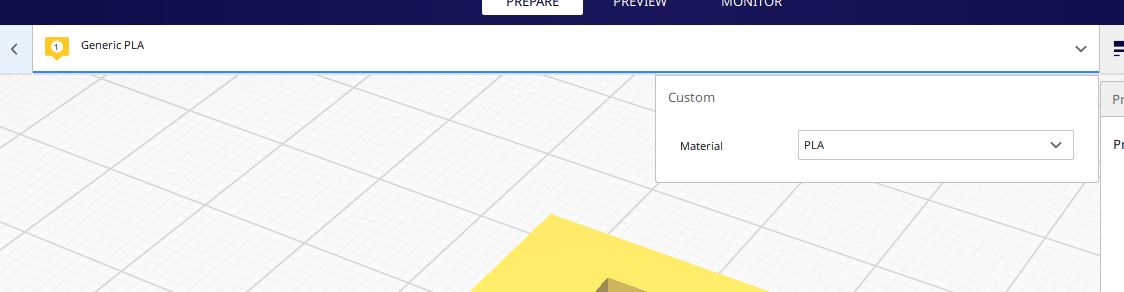
If you click on “PLA”, you’ll discover that cura has a lot of material from different manufacturer in its presets.
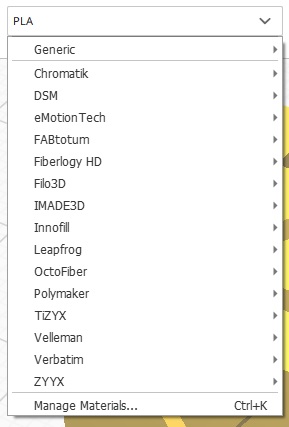
If your material isn’t inside you may create your own… To do so click onto “Manage material”. Then you may create a new material from scratch or by duplicate an existing one. Then you may ajust the melting temperature, the retractation distance … according to the manufacturer or to your test. Their is a lot of calibration file online to tuned the settings of your printer or your material settings. Good luck !
It may be a bit time consumming to find the setting by testing, but it is a good way to learn about 3D printing and to be able to make a diagnostic if something wrong append to your print.
Let’s assume that you have your material ready for now. Let’s configure the print settings. I wanted to test a cool feature of the new version of Cura, the adaptative filling. When your are preparing your part to be 3D printed, you have to tuned a few setting on the right.
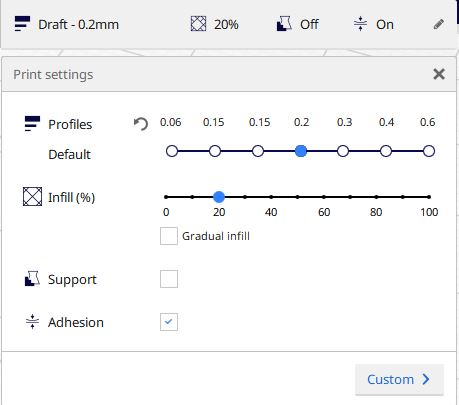
First a all you have to choose the slice thickness of the print. As you may know, 3D printer work by adding melted platics layer by layer. This first parameters is basically the thickness of these layer. It is even considered as the “quality” of the print. But actually (and unfortunatly) its quality depends on lots of other thing. The more the layer thickness will be high, the less you’ll be able to see the layer on the side of your piece.

But remind that, the thinner your layers are, the more time it will required to be printed. The previous pictures is a good comparison to get that thing.
For our test, layer of 0.2mm is pretty decent. So lets move to the infill parameter. Infill is a very particular thing. To save time, developpers of 3D slicers added some very cool stratey for infilling a 3D part. The most common strategy is to build 3D grid pattern inside the part, instead of filling is completly. This is saving time, and plastic ! But it is influencing the solidity of the part as well as its quality.
If the infill is too low, the outer wall may deform during the print and the printhead won’t be able to grow them anymore. For the same reason, the rooftop of the piece will probably be bad as well becaux its need support to print.
Generally setting the infill to 20% or 25% do the job. But you have a large plane parralel to the buildplate, then you may push the infill a bit further. That leads me to gradual infill. Gradual infill is a smart way of generating infill in your part. It is only recommended if you care about the aspect of your part. (And if you don’t care about its mechanical performance). This option will generate infill gradually (Low infill at the bottom, high infill at the top or under top surface). This way you’ll have the perfect balance between time, material, quality.

You may see some red spot on your piece like me :

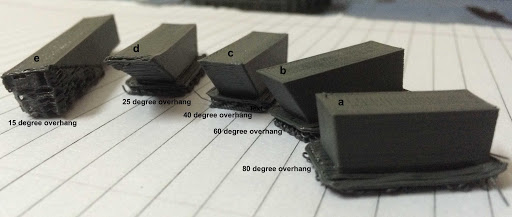
These red region mean that there aren’t support enough by the previous layers. And they may not be well printed. To prevent that, you may activate the “generate support” option. It will generate a kind of removable scaffolding under the red region. You can ajust the maximum support angle that your printer can achieve without failing doing test with calibration parts. After some time you may probabaly reach between 60° and 40° of angle with a decent printer.
Let’s print ! Let’s move to the 3D printer. Before printing, we need to :
- Load the chosen filament
- Clean the buildplate
- Calibrate the first layer
- Tune Temperature
To load the filament simply push the main button, and select Load Filament” The wizard will help you to do so. You may have to remove the previous. There is a simple trick to clean the nozzle when another filament is loaded. Check the melting temperature of the loaded filament. And set the nozzle temperature 30-40° below that point. The filament will be soft but just hard enough to clean everything when you’ll pull it out. Don’t do that trick with special filament such as carbide fiber filament or metal powder filament because you may damage the nozzle. But with PLA it’s ok and useful.
Anyway when you’re filament is loaded in, let’s move to the next step. Cleaning the buildplate. You’ll found a cleaning spray above the printer. Like so :
Just spray once on the plate and use a paper towels to clean the whole plate. Glass spray are good because it has a grease removing effect. Grease and buildplate are not very friendly together. The grease will avoid melted plastic to stick on the buildplate … And we want it to stick ! Another way to to that is by using and hairspray to make the plate sticky. It works with glue to… But both methods may your printer get dirty.. Mechanical stuff prefere grease than sticky things. Finally cleaning with Glass spray is a great solution if you have an heating buildplate.
Heating buildplate ? Yep most of modern 3D printer have a heated bed. Heating the first layer make it softer but it allow the material to maintain its initial form on the buildplate otherwise it may retract and stop sticking to the plate.
Trick of the day : Putting the buildplate in the freezer may make your pieces pop out by magick. (Very useful for large print) : Stop damaging your plate ! Use Temperature change !
After cleaning the bed. You have to calibrate the firstlayer. This will print simple line to let you ajust the distance between the bed and the nozzle. In fact, if it is too low, the nozzle will damage its previous path. And if it it too high, the material will not stick to the bed. Ajusting that height is a bit tricky and if for some reason your print isn’t doing very well despite your calibration, you can adjust the height live during printing.
IMG
After my first calibration, the nozzle was a bit to low. And the first layer was crappy :
IMG
I have adjust the height again and the result went way better. Even the layer seems doing well, watch it carefully, it may went wrong.
Finaly I decided to print a SD card holder for the Prusa. Here is the result :
Result : IMG
The part is fine. The layers are not too visible and the top surface is flat. But there is still a problem ! The SD card doesn’t fit in ! The reason is, according to your printer you may adjust a offset paramter to acheive better precision. Due to the material dilatation, the holes for the SD card are too thin. I’ll wait until is cold enough. And if it doesn’t fit anyway i’ll try tho make the hole thicker with a lime.
Finally : It works !